
Creating the increment counter application using Redux in React
- Install the redux and react-redux libraries for your application using the below command. Once installed, verify if the required packages are installed in the package.json file.
- 1
npm install redux react-redux --no-audit
-
In this application that we are building to learn the use of redux with react, we will have one MainPanel component which contains two internal Components, MyButton and DivPanel.
-
MyButton is a button component which maintains a counter onClick. The value of this counter will be displayed in DivPanel. The content of DivPanel will be automatically refreshed everytime the counter value changes.
-
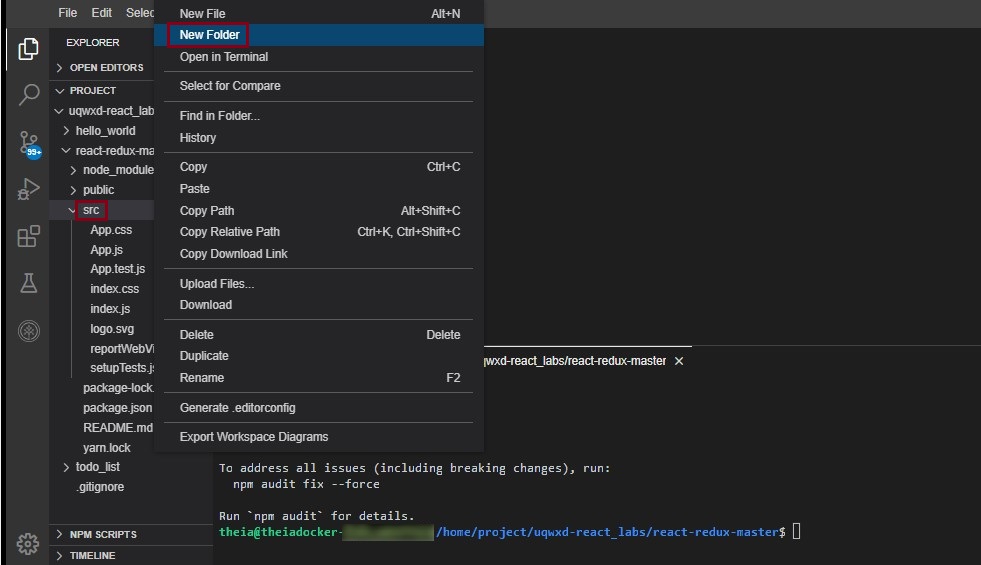
Under the src folder, create a folder named action to define the actions for our application. The only action you are going to perform is incrementing of the counter. In the action folder, create index.js and paste the following code given below.
- 1
- 2
- 3
- 4
- 5
- 6
- 7
- 8
const increment = (val) => {return {type : 'INCREMENT',inc : val}}export default increment;
val is the value you want to increase the counter by everytime the button is clicked. Now that you have your action which defines what is to be done, you will create the reducers which will define how it is done.
- Under the src folder, create a folder named reducers. In the reducers folder create index.js and paste the code given below.
- 1
- 2
- 3
- 4
- 5
- 6
- 7
- 8
- 9
- 10
- 11
- 12
- 13
- 14
import {combineReducers} from 'redux'const counter = (state=0,action)=>{if(action.type === 'INCREMENT') {//This will increase the value of counter by the value passed to the increment methodreturn state+action.inc;}//Returns the current value of the counterreturn state;}const myReducers = combineReducers({counter});export default myReducers;
- Now you have your action and reducers. What is left to be created is the store. Before you create the store you will create the components. Create a folder for the components named components inside the src folder. Create MyButton.js file inside the component folder and paste the code given below.
- 1
- 2
- 3
- 4
- 5
- 6
- 7
- 8
- 9
- 10
- 11
- 12
- 13
import React from 'react'import { useDispatch} from 'react-redux';import increment from '../action'const MyButton = ()=>{let dispatch = useDispatch();return (<button onClick={()=>dispatch(increment(1))}>Increase counter</button>);}export default MyButton;
useDispatch dispatches the event to the store and finds out what action is to be taken and uses the appropriate reducer to do the same.
- You will now create the DivPanel.js file inside the components folder which will contain DivPanel where you will display the counter value.
- 1
- 2
- 3
- 4
- 5
- 6
- 7
- 8
- 9
- 10
- 11
- 12
- 13
- 14
import React from 'react'import { useSelector } from 'react-redux';const DivPanel = () =>{let counterVal = useSelector(state => state.counter)return (<div>The present value of counter is {counterVal}</div>);}export default DivPanel;
useSelector is used to select the state from the store whose value you want to access.
- Now we will create the MainPanel.js with the two components in the file MainPanel.js.
- 1
- 2
- 3
- 4
- 5
- 6
- 7
- 8
- 9
- 10
- 11
- 12
- 13
import React from 'react'import MyButton from './MyButton'import DivPanel from './DivPanel';const MainPanel = ()=>{return (<div>This is main panel <MyButton></MyButton><DivPanel></DivPanel></div>);}export default MainPanel;
- You have all the panels created. Now let’s render the MainPanel through App.js. App.js contains the code give below.
- 1
- 2
- 3
- 4
- 5
- 6
- 7
- 8
- 9
- 10
- 11
- 12
- 13
import React from 'react';import MainPanel from './components/MainPanel';function App() {return (<div><MainPanel/></div>);}export default App;
- Now for the final set up of the react application. You need to create and set up the store, where you can manage all the states (in this application, the counter) you want. This is done in index.js.
- 1
- 2
- 3
- 4
- 5
- 6
- 7
- 8
- 9
- 10
- 11
- 12
- 13
- 14
- 15
- 16
import React from 'react';import ReactDOM from 'react-dom';import App from './App';import {Provider} from 'react-redux'import myReducers from './reducers'import {legacy_createStore as createStore} from 'redux';;//Create the storeconst myStore = createStore(myReducers);//This will console log the current state everytime the state changesmyStore.subscribe(()=>console.log(myStore.getState()));//Enveloping the App inside the Provider, ensures that the states in the store are available//throughout the applicationReactDOM.render(<Provider store={myStore}><App/></Provider>, document.getElementById('root'));
- In the terminal, ensure you are in the react-redux directory and run the following command to start the server and run the application.
- 1
npm start
You will see this output indicating that the server is running.
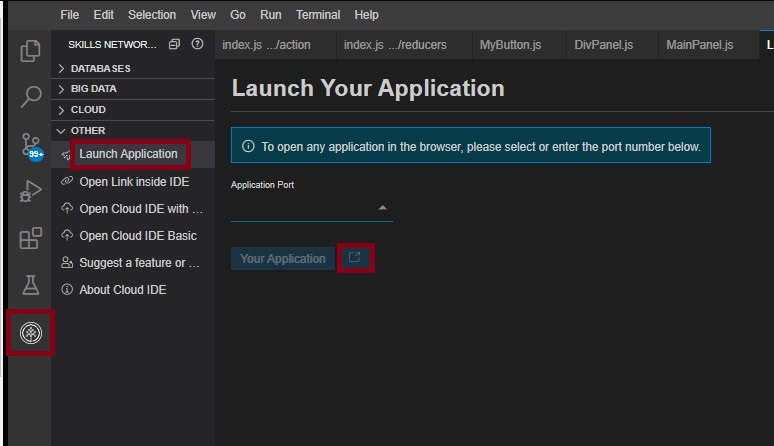
- To verify that the server is running, click on the Skills Network button on the left to open the Skills Network Toolbox. Then click Other. Choose Launch Application and enter the port number 3000 on which the server is running and click the launch icon.
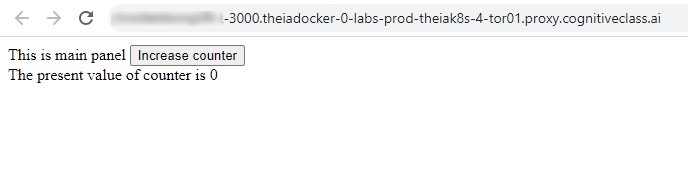
The increment counter application using Redux will appear on the browser as seen in the image below.Check the application by incrementing the counter.
- To stop the server, go to the terminal in the lab environment and press Ctrl+c to stop the server.


