PrestaShop is a popular e-commerce platform that allows users to create and manage online stores. One of the most common questions among PrestaShop users is how to change the number of products displayed per page on their store. In this article, we will guide you through the process of changing the products per page on PrestaShop.
Step 1: Log in to your PrestaShop admin panel
To start, log in to your PrestaShop admin panel. You can do this by entering your username and password on the login page.
Step 2: Go to the Preferences section
Once you are logged in, navigate to the Preferences section of your PrestaShop dashboard. This can be found in the left-hand menu under the heading "Preferences".
Step 3: Click on the Products tab
Once you are in the Preferences section, click on the Products tab. This will open up a new page where you can manage various settings related to your products.
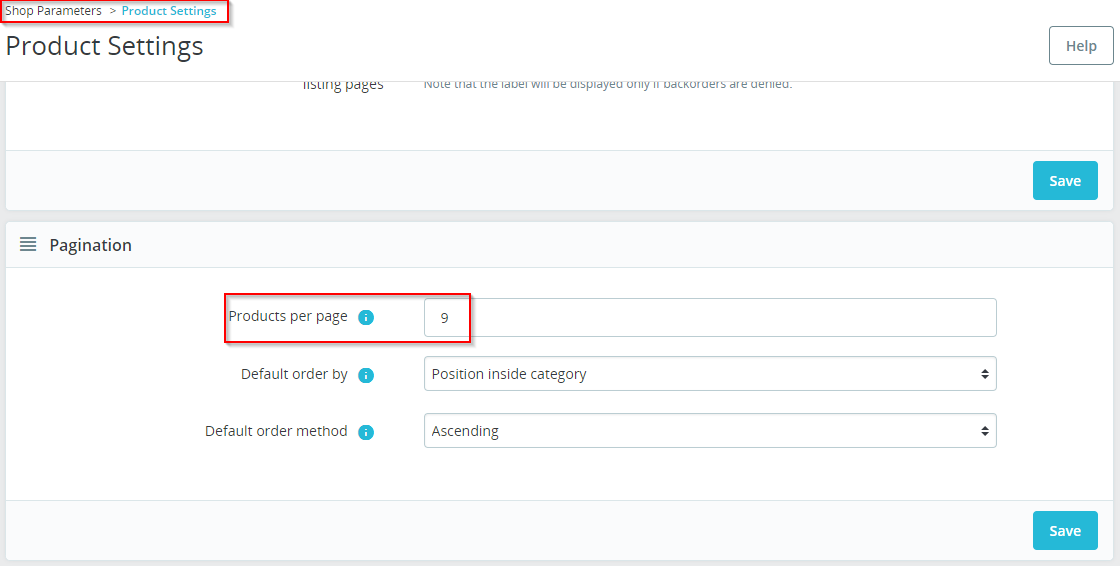
Step 4: Change the number of products per page
On the Products page, you will see an option for "Products per page". This will allow you to specify the number of products that are displayed on each page of your store.
Simply enter the desired number of products in the field provided and click on the "Save" button to apply your changes. PrestaShop will now display the specified number of products per page on your store.
Step 5: Clear the cache
After making changes to your PrestaShop store, it is always a good idea to clear the cache to ensure that the changes are visible to your customers. To do this, go to the Advanced Parameters section of your PrestaShop dashboard and click on the Performance tab. From here, you can click on the "Clear Cache" button to remove any cached data from your store.
Another Solution:
In addition to changing the products per page through the PrestaShop admin panel, you can also make the adjustment by logging in to your phpMyAdmin and updating the ps_configuration table. To do this, select the database of your PrestaShop store and execute the SQL command:
UPDATE ps_configuration SET value = '9' WHERE name = "PS_PRODUCTS_PER_PAGE"This command will set the value of products per page to 9, but you can adjust the number to your desired amount. It's important to note that updating the database directly is not recommended for beginners and should only be done by experienced users who are familiar with SQL queries and database management.
Conclusion:
Changing the number of products per page on PrestaShop is a simple and straightforward process. By following the steps outlined above, you can easily customize your store to display the number of products that you want. Whether you are just starting out with PrestaShop or you are a seasoned user, these steps will help you to optimize your store and improve your customers' shopping experience.